
- Go to www.office.com from any browser
- You will be prompted to setup the MFA verification method.
- You will be prompted to setup the MFA verification method.
|
# |
Verification Method |
Verification code / Notification |
Description |
|
1 |
Authentication via Mobile Text **** PREFERRED METHOD FOR EASE |
Send me a code by text message |
Sends a text message containing a verification code. The user is prompted to enter that code into the sign-in interface. |
|
2 |
Authentication via phone |
Call me |
Places an automated voice call. The user answers the call and presses # on the phone keypad to authenticate. |
|
4 |
Mobile app |
Code |
The Microsoft Authenticator app generates a new verification code every thirty seconds. The user enters this verification code into the sign-in interface. Use this verification method in case you do not receive cellular service |
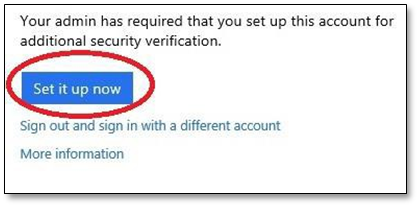
- Log in to your Office 365 account. After you enter your user ID and password, a screen will prompt you to set up the additional security verification.
- Click on the “Set it up now” option.
 |
|
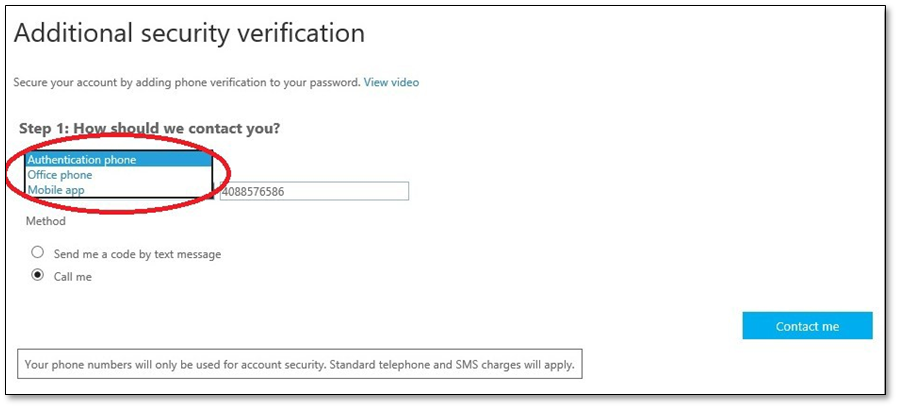
Step 2: Select verification method On the Additional Security Verification screen, you will be asked to select the verification method and how you want to receive the code (i.e., contact method). The drop down will provide your three choices for the verification methods.
 |
|
Below are the setup instructions for all the verification methods:
-
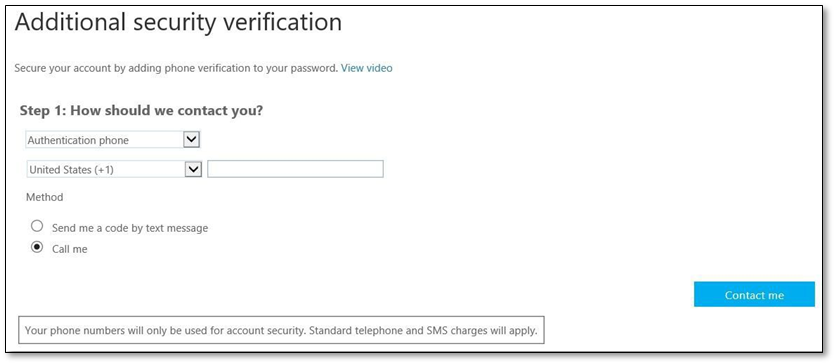
- Select the Authentication Phone option from the drop-down list.
-
- Select Unites States as the country name if not already selected.
- Enter the 10-digit cell phone number by which to be contacted. Do not include spaces, parentheses, or any other punctuation marks.
- Select how you want to receive the verification code.
-
- Select Contact Me
- If you selected “Send me a code by text message”:
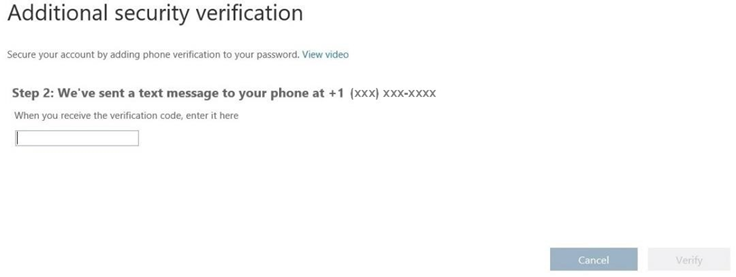
- You will receive a code via text message.
- The screen will now ask you to enter the code sent to your phone. After you enter the code, click on Verify.
 |
-
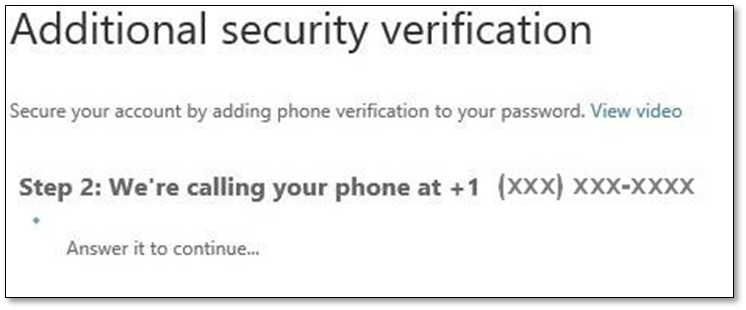
- If you selected “Call me”:
- You will receive an automated call. Answer the call and when instructed, press # on the phone keypad.
- If you selected “Call me”:
-
-
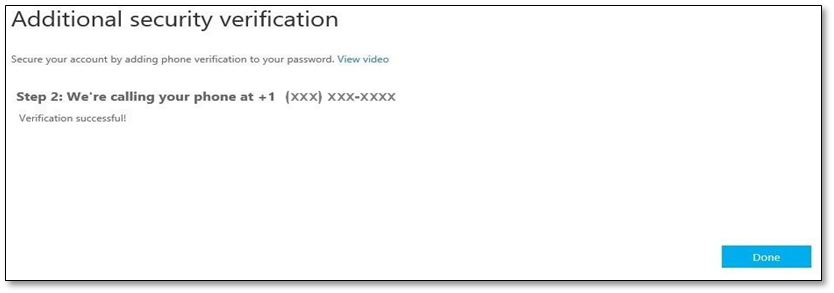
- After your call is completed, you should see the following screen. Click Done to continue.
-
 |
-
- You will be directed to your Office 365 account.
-
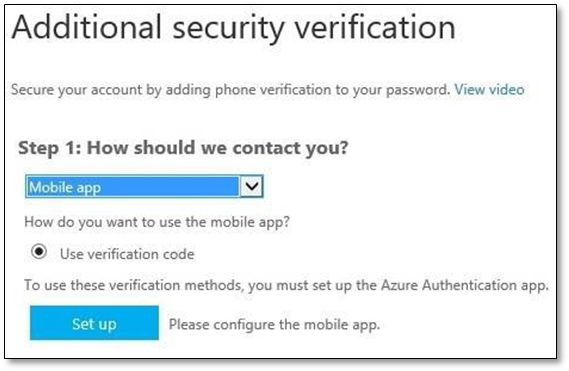
- Select Mobile App option from the drop-down list and click on Setup.
 |
-
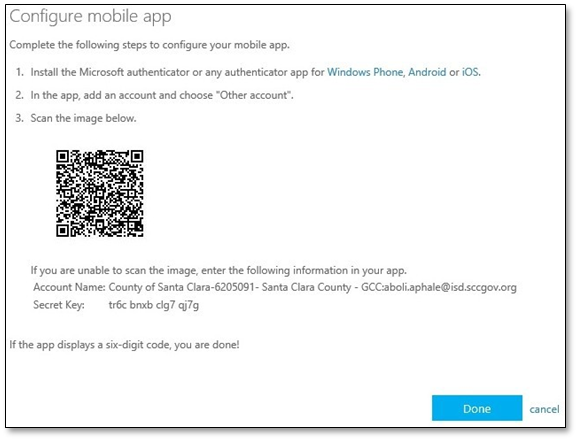
- You will see the following screen.
 |
-
- On your phone, download and install the “Microsoft Authenticator” app.
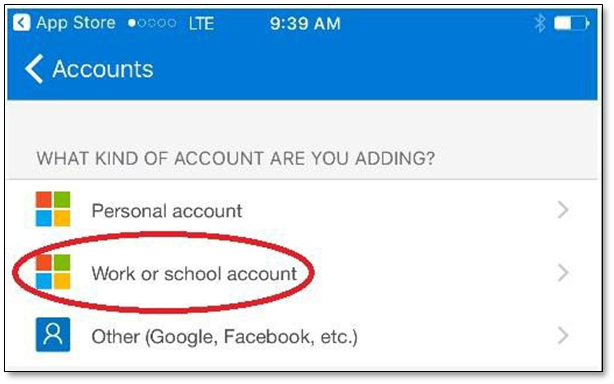
- In the app, add an account and choose “Work or school account”. Below is a screenshot as seen on an iPhone.
 |
-
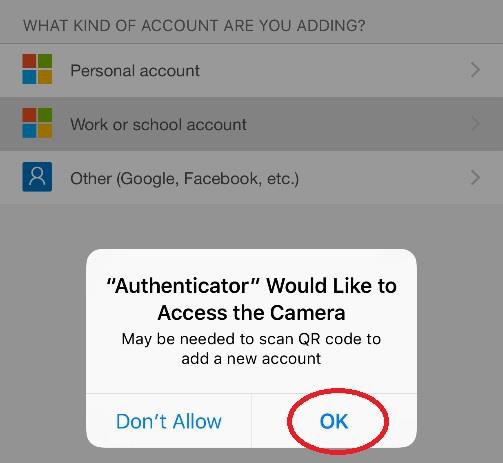
- If you are prompted to allow the Microsoft Authenticator to use your camera, click on OK.
 |
Done.
-
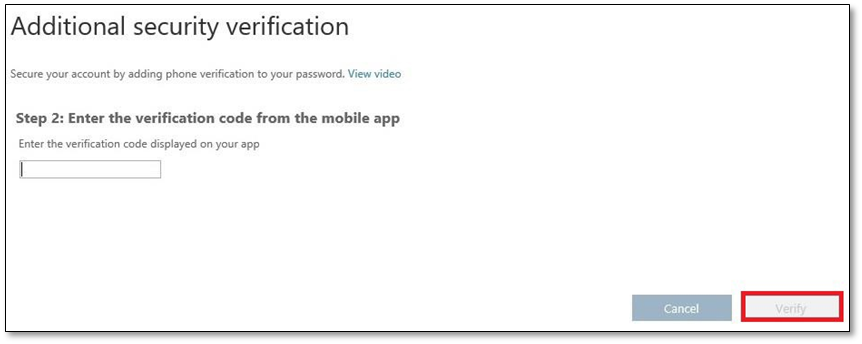
- A six-digit code will show on your phone. Enter that code and click on Verify.
 |
-
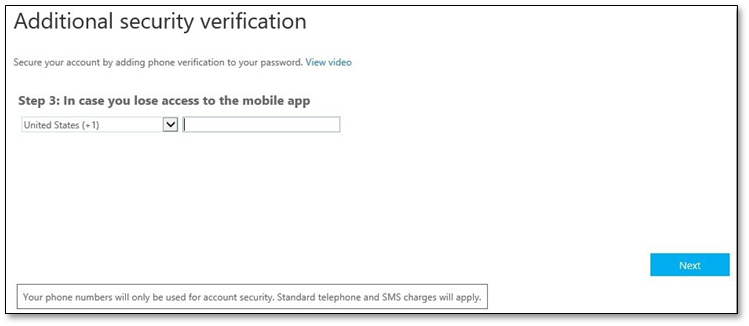
- Enter your cell phone number and click on Next.
 |
-
- You will be directed to your Office 365 account.
After setting up the verification method
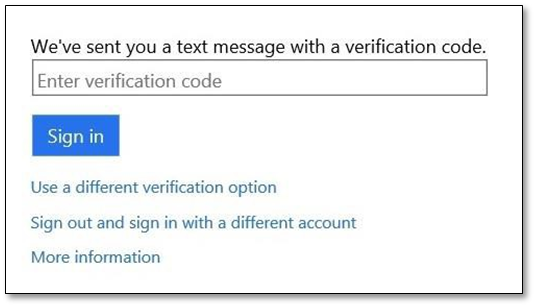 |
The next time you log into your O365 account after you enter your user ID and password, you will be challenged to authenticate yourself. Depending on the verification method chosen, you will either need to enter the verification code or answer the automated phone call. Below is an example of the screen prompting you to enter the verification code.